If anyone’s trying to learn a language I’ve recently discovered this company called the Language Pod Company and it is so much better than Rosetta Stone and it’s completely free (unless you’d like one-one-one teacher-student help then it’s like $25 a month which tbh you shouldn’t really need because they make it really clear in the lessons). It’s super easy to navigate and it even gives you a history of the language. There are audio and video lessons. Real-life situations and different speakers. They even write the letters for you because I know sometime it’s hard to learn to write in a language that doesn’t use the same alphabet that you’re used to. You’re welcome.
I know a ton of you have been waiting for this one. Teaching you to make your own plastic keychains!
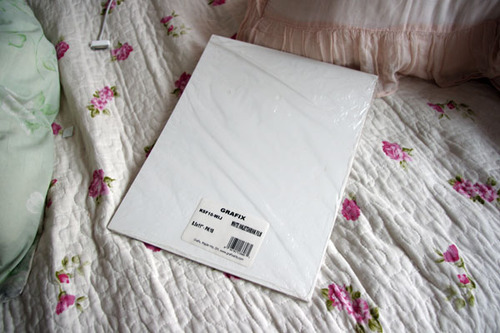
To start off, I think the biggest question everyone has is what I use to make them. I work with shrink film. You might be familiar with Shinky Dink brand shrink film as a kid. I use Grafix brand white inkjet shrink film. The inkjet kind is relatively pricey compared to the regular kind. If you’re using regular, I don’t recommend you stick it in your printer. Sharpie markers would be good for that.
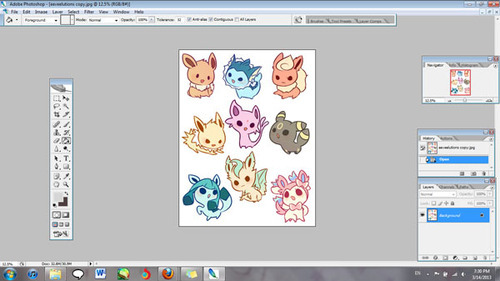
Alright, now open up the file with the images that you’re working with. Make sure your images are a lot bigger than you want your finished product to be since they shrink significantly.
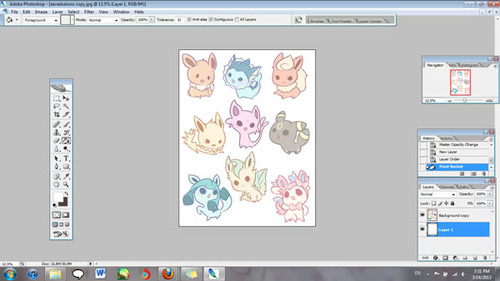
You’ll also want to lighten the opacity to about half. I go somewhere between 50-60%.
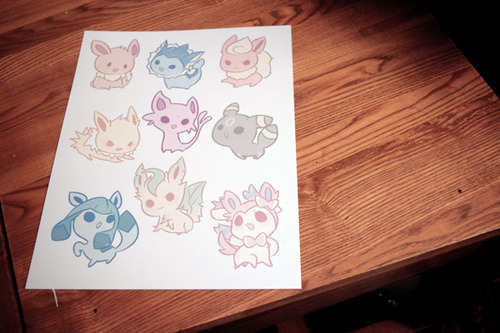
Now print your image out! I’ve found that it works best for me when I have it at the plain paper setting, and standard print quality.
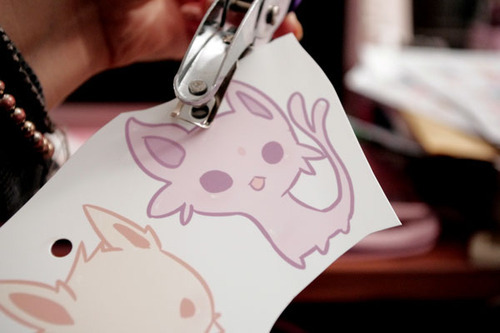
Holepunch with a ¼" holepuncher BEFORE you shrink them. It’s so much more work to have to punch holes when your plastic is thick!
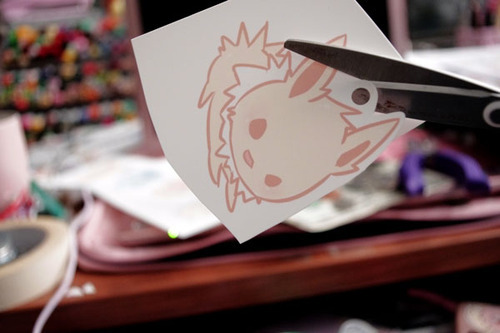
Cut out your design, leaving the amount of border you want.
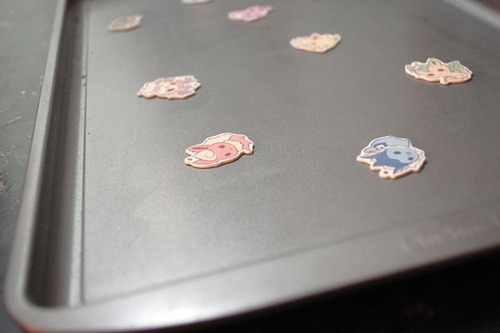
Set them on a tray for convenience. An aluminum foil sheet works too, but I recommend cookie trays because they are easier and quicker to get out of the oven.
Preset heat. Your shrink film package will tell you what temperature to set it at, but I find that it isn’t always accurate for me. I generally set temperature to 350 degrees or so.
Put them in the oven. Remember to keep track of time! I leave them in for about a minute and a half.
After time is up they should be super small! Magic!
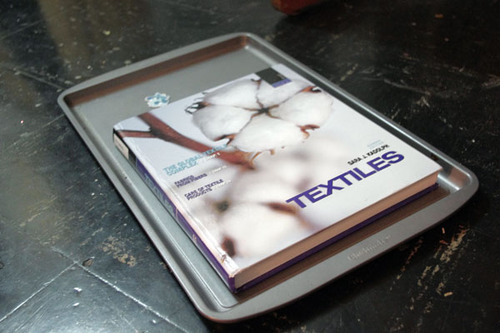
If your charms are not flat, put something heavy on it right out of the oven when they are still hot and malleable.
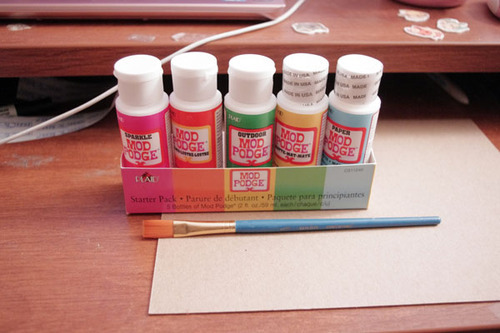
If you’d like to, you can seal them now. In my last two batches, I used clear topcoat nail polish. The problem with that is that I need between 3-5 coats of it, and it takes a while to dry. I’ve been experimenting with modpodge.
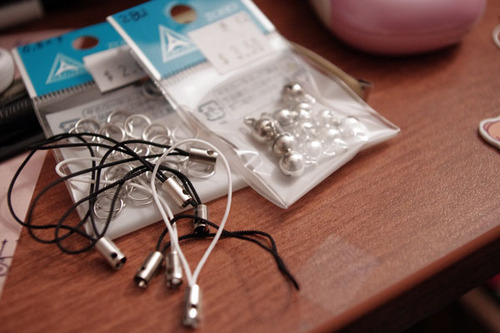
For lariats, you can use jump rings or lobster clasps.
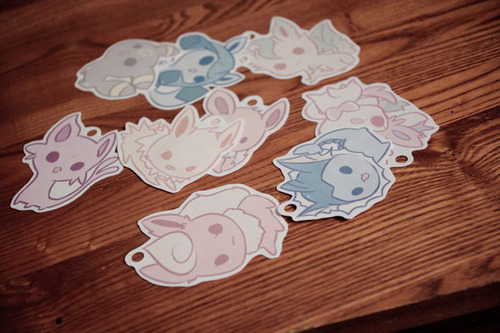
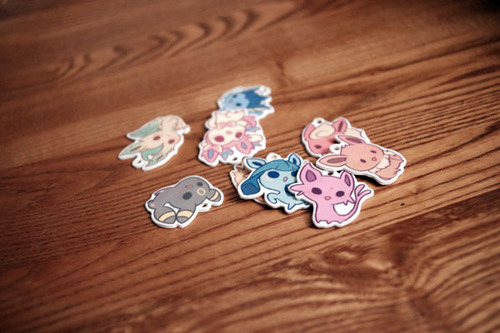
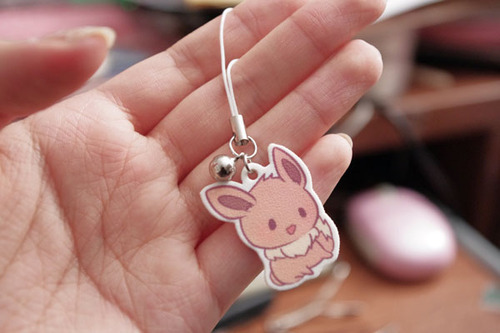
Here is one that I made that wasn’t sealed. The finished texture after shrinking is a little bit rough. There’s nothing wrong with leaving them unsealed, but because they are inkjet printed, the colors wash right of without protection.
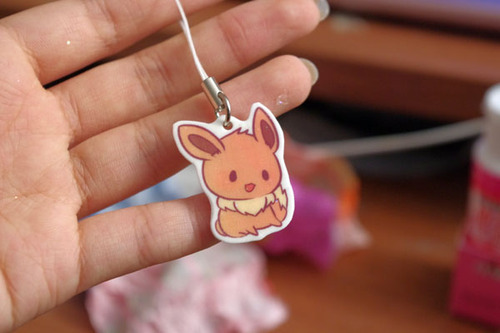
This is one that was sealed with modpodge. The colors become a little more vibrant and smooth and water resistant. Things often get stuck on when applying or drying so be careful.
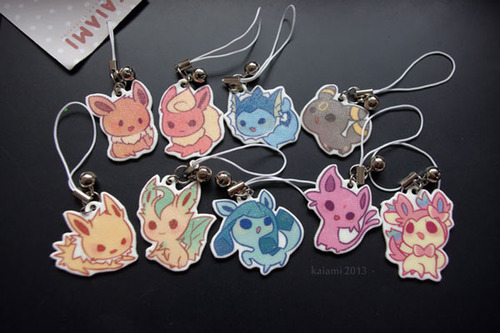
These ones down here were sealed with clear nail polish. They come out shiny if you put enough coats, but the grainy texture will still be there.
Well, there ya go! Have fun making your own keychains!
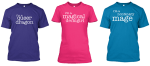
Thank you so much to everyone for voting! Because of the overwhelming amount of responses we’ve already received, we’re going to go ahead and open the shirts for orders much sooner than we planned.
Shirts will open for orders on Friday, May 8th!
You will have 21 days to place your orders, and any shirts that receive 10 orders during that time will be printed. I know we previously said it might be more like 3-5, but after further researching Teespring’s policies, it seems that our shirts will require 10 orders.
Shirts will cost $15 and be available in fitted and non-fitted options, in a variety of colors. There will also be a $25 charcoal grey hoodie option.
If you want a sneak peek at the identity/character pairings that will be available, there’s a list under the cut!
Well, just given the tags this post has gotten in the last hour, I’d say there’s at least a handful of very excited people wanting the ace writer shirt. 🙂 And during our initial votes, “Asexual” had 67 votes, which is why we provided so many options for it.
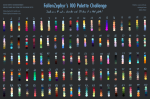
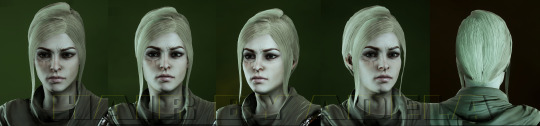
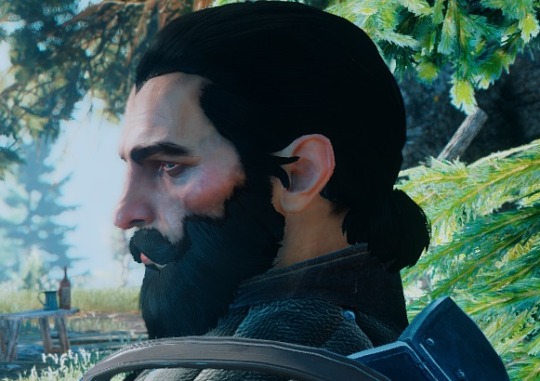
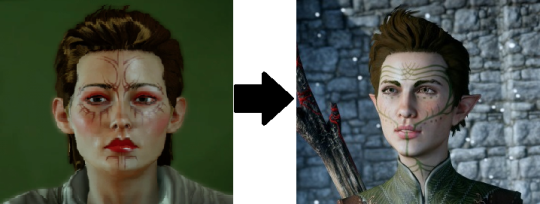
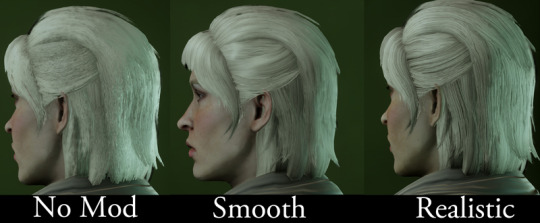
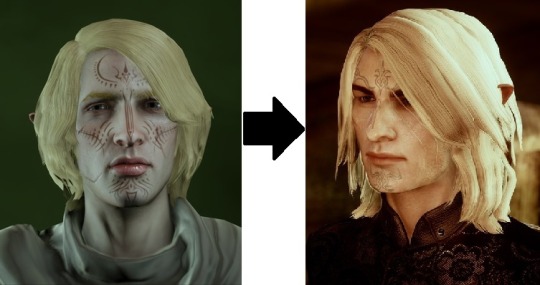
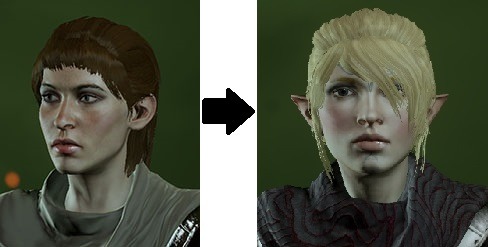
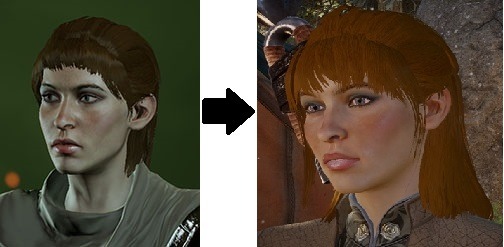
Because there’s enough now that it’s hard to keep track! These are NOT my mods, but I want to spread the word and make them easier to find. All are links to where the mod authors have published their mods. I do NOT directly link to the file! Please let the mod authors know you love what they’re doing!
Remember that the only way to get hair mods to work is to REPLACE an existing hairstyle. When possible, I’ve noted which hairstyle is replaced by which mod below.
NOTE: All these hairstyles play together (I have them all loaded in my mods at the same time) BUT most of them require Ultra settings in your graphics to work.
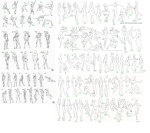
So recently as some of you may know I had to figure out how to make these green arm wraps in the picture below
I wanted them to be one piece so that they wouldn’t have to be adjusted throughout the day if parts decided to slip, especially since the original plan was to tuck the shirt into them, *edit: l guess it should be added that we wanted something that not only wouldn’t have to be adjusted but something that wouldn’t have to be wrapped and was made of a more durable cloth like material.* I searched the internet for a while but couldn’t find anything too helpful so I decided to make it up as I went along and took pictures so I could share in the event it worked. (It did) This process should work for just about any wrap you want to create for instance things like this as well…
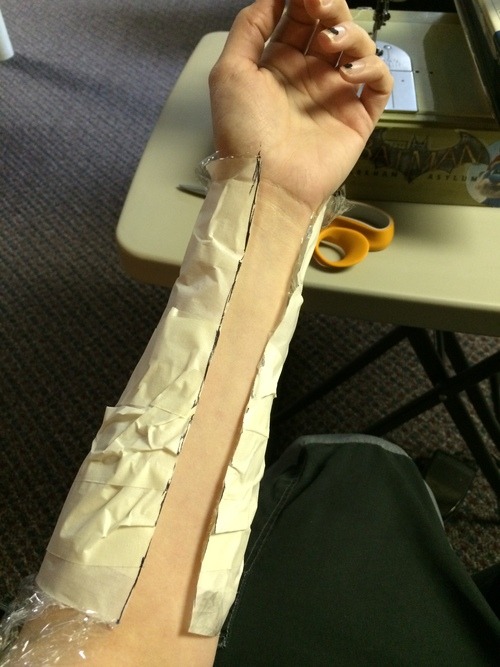
There isn’t much to it but I took a lot of pictures, so here we go. First things first, you’ll want to wrap what ever part of your body you are making the wrap for in plastic wrap (we use this method frequently). Mine was just the forearm so it looked like this
Then wrap it again in tape, masking tape works nicely.
After that you want to draw where the seam is going to be and cut along it like so
Once you have the piece disconnected from your body you want to flatten it, I placed my piece under a pile of binders for about a day
While you are waiting you can get started on the strips of fabric you’ll be using later. Figure out how thick you want the bands to look and measure them out of the fabric you are using
Don"t forget to add a seam allowance, like I did. The length of the strips doesn’t really matter right now, as long as it’s long enough to wrap around your arm once you should be fine. I cut out 12 to be on the safe side. You should have something like this.
Once I had the strips cut out I folded the seam allowance over on all of them, this made it easier later when I attached them to the main piece.
You can then put the strips to the side and go back to the main pattern piece. For the forearm it should look something like this once flattened
You’ll want to clean up the edges with the plastic hanging off and then transfer the pattern piece onto a piece of paper, again making sure to add seam allowance around the edges.
Once you’ve traced around the whole thing you can cut it out and that will be the pattern for the main piece of your arm wrap. Use the pattern to cut out a piece in the fabric you are using and together with your straps your pieces should look like this.
You want to sew on the strips one at a time, starting from one end then making your way to the other. I started from the bottom. Pin the strip onto the main piece along the hem you already created like this
You then want to sew the strip down along the top and bottom edge. There will be fabric hanging off from the strip, you want your seam to stay in between the edges of the main piece. After that is sewn on cut off any extra material from the strip.
It should look something like this
Continue with the other strips. I attached mine diagonally for the most part. When I was done attaching my strips (I only used 6) this is what I had.
Sew your side seams together.
And then hem the top and bottom.
Viola! You should have an arm (body) wrap that you won’t have to wrap!
(I didn’t hem the top because I attached it directly to the shirt) Also it should be noted stretch material should probably be used. Hope it helps someone! 🙂
As you may know, the month of May is BPD Awareness Month. We’re going to suggest a different theme for each day to support #borderlinebrilliance. While awareness is important for people who don’t know much about BPD, it’s just as important to remind others (and ourselves) that we are wonderful people deserving of love and admiration. I don’t want this month to be just about, “This is BPD, and this is what it means.” I want to celebrate being borderline.
Originally, we were talking about the idea of a selfie day, but now I’m thinking, why stop there? Let’s do something every Saturday of the month of May. We have the entire month, after all.
May 2nd – Post a selfie (or two or three or more!)
May 9th – Post a current project (art, sewing, writing, maybe something at work or school, a paper you’re writing, anything!)
May 16th – Post a photo of you wearing black and white, or a black and white photo, or take a photo of something black and white to represent the “black and white” moods of BPD.
May 23rd – Post a fictional character you relate to and explain why.
May 30th – Post some positive things about having BPD, what you’ve gained and how it’s made you a better person.
Tag your posts as #borderlinebrilliance so we can keep up with each other!
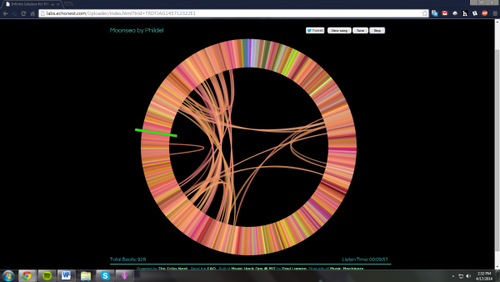
It is the best goddamned thing you’ve seen all day.
Say hello to the Infinite Jukebox, an experiment in looping songs. See those curves cutting through the circle? What this bad boy does is analyze the song for similar beats and sounds, then randomly skips between said beats forever.
Yes, you heard me. Forever. With this piece of musical genius, you can literally play the same song for as long as you want – It will create the song that never ends.