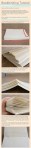
Bathbomb Tutorial!
Being of irrelevant status in most of what’s “cool,” I had no idea what the hell bathbombs where until just recently, and I was pretty unimpressed with the prices at places like Lush. I looked up a recipe and ordered the ingredients online and have messed with it in the few batches I’ve tried so far. Starting with a pound of each dry ingredient, I can make about four batches of six or seven bathbombs, depending on how consistent I am with my sizes, which isn’t often. Anyway, here’s how to make your own!
Dry Ingredients:
- 1 cup baking soda
- ½ cup citric acid
- ½ cup corn starch
- 1/3 cup epsom salts
Wet Ingredients:
- 2 1/2 tbsp olive or any other light oil
- 1 tbsp water
- 1 tsp fragrance oil
- 10 to 12 drops of food coloring
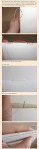
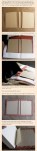
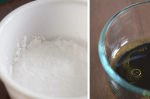
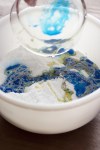
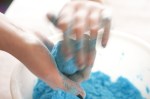
Mix your dry ingredients together, and set aside. Pour the wet ingredients into a small cup and pour it together into the dry.
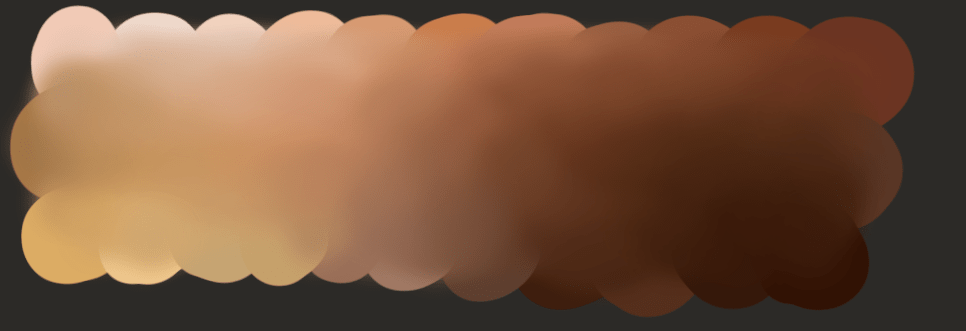
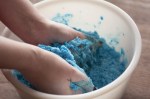
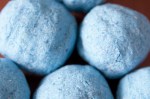
Enjoy that fizz for a sec, and the color, ooooooh. Anyway, mix together throughly and then pack into small balls or place into molds (let set for a couple of hours, then it can air dry).
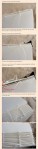
These will take anywhere from a day to two to dry out fully, so if you’re like me and are impatient to test, yes, you can still dry one out. It just probably won’t float, if you want that.
Speaking of which, if you get extra oil into the mix, it will take longer to dry, and will probably be heavier, so mix in extra epson salts. Extra epson salts alone make for a speeder drying time and a little extra shine.
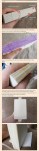
Make sure to get body safe oils and colors, not candle stuff, go for soap making materials. Mixing colors leads to interesting results, I tried to make purple, and my bathbombs dried to a cakepop like looking ball, but in the water it’s a most fabulous pink. Try mixes of scents (but don’t overdo it, tried something that now smells like playdoh in another batch) and see what combos you can come up with!
I’d love to see what everyone creates, send me photos or reblog with your own! Happy crafting!
This is definitely something I’ll have to try! I love taking baths and don’t often get to spoil myself at Lush, so this would be cool.
I wanna try to make some!
Tag: ref

1. Game Making Tools
[no coding required][some coding required][more info]2. Graphics
[create your own graphics][download graphics][create your own models]3. Sound & Music
[create own sounds][download sounds/music]4. Distribution
[upload your game]
- dropbox
- indiedb
- itch.io
- gamejolt
- newgrounds (only flash/html5/unity games possible)
- kongregate (only flash/html5/unity games possible)
- …more distribution options
info:
- creategames.tumblr.com by @PixelProspector
- icons by font awesome
oooo
Simple book binding tutorial, very useful for making your own personalize Book of Shadows
I got bored and made a giant character generator. 7 different categories with at least 17 options each (some have more), including fantasy, sci-fi, supernatural, modern, and historical possibilities… which means that characters can get ridiculous really fast (like flamethrower-wielding, Feudal Japanese cyborg priestess with a pet unicorn). Have fun with what you get or try a few times if you want a serious character.
If you do make a character with this, tag ‘characterdesigninspiration’ so I can see them!
Immediately got merperson with long legs.
…
This is going to be difficult.

It is not the prettiest but here is a little chart I made of skin tones.
The idea is to eye-drop anywhere on the chart to get a unique skin tone instead of getting stuck in the loop of “white, tan, dark”.
For those of you unaware, HeroForge launched today and it’s hella rad. You can customize your own 3D printed tabletop game miniature. While our GIF subject uses fantasy stuff, there are also options for other genre characters as well.
The level of customization is pretty impressive (and, at times, quite amusing).
If you’ve got $15-$25 you’re willing to part with to ensure you get a miniature that matches your character just right, then I highly recommend having a look.
The customization of this is indeed fantastic. I absolutely love it. I especially like how they don’t limit facial hair by gender. My only critique is that there isn’t any other armoured skirt for her.
And no exaggeration, I really like this character I managed to slap together. The mustache isn’t even for a joke or anything, I think it legitimately looks good on her.
COOL
WOW THIS THING IS SO COOL.
HEY THIS IS AWESOME OMG
remember these, kids? they used to be so popular on deviantART way back in like 2008 and i remember i used to be so pumped about doing one, though i never really did. so, last night i even had a dream about doing one of these, so i put together some scenarios and here we are, haha! feel free to reblog or save the template for yourself if it catches your fancy!
hair tutorial?! please :3
HELLO! I’m not too sure on how to make a hair tutorial since i kinda just go the hell out with it (its really inconsistent it hurts lol). But i’ll try my best!
Scalp points is really important. You would want it to look natural, and from there you can control where your front hair goes. There are 3 main points, one in the middle and the other two by your temples.
I usually divides my hair sections into 3: the front, sides, and back. YOU DONT REALLY HAVE TO FOLLOW EVERYTHING THOUGH, JUST DO YOUR THANG. I know, my hair structures doesnt make sense with the points and stuffs lmao. But yeah you got my point.
Examples with different hairstyles:
Note to self: do not attempt curly hair if you’ll just fuck things up
Side view examples:
Girls Hair example:
Girls hair doesnt make sense. Just go crazy and make them fabulous queens.
So yeah, thats all i manage to think of. There are great artists out there who make better tutorials than me lmao. Check out kelpls amazing tutorials, or just look at some fancy kpop artists’ hair for reference
their hair are amazing
for my followers in long distance relationships/friendships:
the website rabbit is amazing for watching netlfix, youtube, hulu and more with your friend/datemate/queerplatonic babe. seriously, you can chat, watch movies and tv together, and see their face and hear their voice. signing up is completely free and up to 10 people can be in the same chat. please please give this website a try, you won’t regret it.

Ever have trouble finding boots in the right color? Tried spray-painting them and ended up with a dry, cracked mess?
A fantastic friend recently advised me to paint leather boots (and any other leather goods) with floral paint. This is a spray paint that is light and flexible enough to use on live flowers. Above are the Poison Ivy boots I painted for a friend, which turned out fantastic.
One thing though: Wear them while you paint them, and maybe stretch your foot around in between coats. I didn’t think of this, and while the paint did not crack at all, it started to split where the boots were stretched from walking. Next time I paint some boots, I’ll let you know if I was able to fix this problem.
The paint I used is called Design Master, and you can find it at Michael’s or Joann Fabrics. In the stores near me, Michael’s had a better selection of colors and a slightly better price, but that may not be true everywhere. This color is “Holiday Green.”
Great alternative to spray rubber and plasti-dip or bootcovers, and cheaper than leather paint! Reminder that Michaels and JoAnns both frequently offer 50% off coupons and will match competitor coupons and offers!!
yooo i used this stuff on my ball gown shoes a while back and it worked perfectly. also if you rub pure acetone on your shoe before you paint it, it will rub off the leather/pleather etc sealant and absorb the paint even better, lessening your chances of the paint splitting in some areas. also spraying it with water proof sealant for shoes will help out a great deal as well!
this stuff is AMAZING it only took one coat to evenly color my boots in the perfect color!! It’s a little expensive for paint but it’s way cheaper than finding shoes or other leatherwear in the “perfect” color, and this way you can choose the preferred style and color as needed!!


